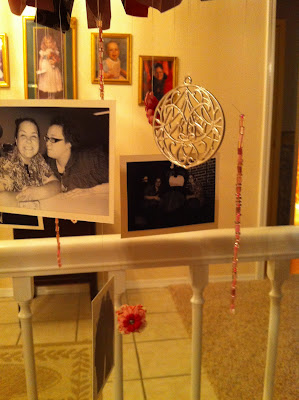
So, I finished the Super Secret Surprise!
My best friend in the entire world turned
25 (again) a few weeks ago. ;-)
Chrissy, went to OKC for some girly time
and shopping! It was a total blast.
Katherine is forever inspiring me to be
crafty so I wanted to do something extra
special just for her. This is what I came up with.

I found the original idea over at
Holly had originally created her first
"chandelier" as a birthday present for
her husband, over at her personal blog
was amazing and decided to try it myself!

I started with a variety of papers I accumulated
from Michael's during their AWESOME
5 for $1 sale a few months ago. I was able
to nab some spectacularly amazing
scrapbook paper for a very low price. I also
picked up a few other items mentioned in the
pictures down below! I ended up not using
the glitter, the glittery picture frame or
the jar full of butterfly punches. They just
didn't fit with what I ended up with.
Katherine's scrapbook room is decorated in
black and pink, so I decided I would go
with the same theme for her chandelier.
Some of my favorite embellishments are the
Got Flowers? from Michael's. I made
five sets of matching flowers, used Reflections
jewel brads in each one, and glued them back to back.
Before I glued them I used thin jeweler's wire
to tie a string around the backside of
the brads so that I could hang the flowers
from the mobile after I had assembled it.
I won't go into the entire tutorial, since Holly
did an outstanding job of showing how to
set the mobile up. However, I will say, in the
original creation she used pages out of
a book for her mobile. I used thick scrapbook
paper, and it made the folding and fanning
process much more difficult. Where Holly
used staples and a glue stick, I had to use
a glue gun to secure my pages together.
I ended up cutting the 12x12 sheets of paper
in half and using 6x6 sheets to accordion fold
for the chandelier part of the project.
I found some awesome pieces of jewelry also
on sale at Michael's that I was able to incorporate
into the mobile. The long, skinny pink beads
were Bead Gallery jewelry beads that I attached
to jeweler's wire (like very thin fishing line)
to hang from the mobile. I also utilized a
necklace and earring pendant set (also from
Michael's) to add a little bit of flair!
For the pictures, I chose to go with
classic black and white, and I printed them
wallet size (3.5 x 2.5) at Wal-Mart. It worked
out perfectly because wallet prints come in
sets of 2, so I used a piece of thick, white, glittery
card stock, glued one of each picture
to either side of the card, and attached a piece
of jeweler's wire before glueing one side so that
I could hang them from the mobile.
We girls had a fabulous weekend together,
and I know Katherine loved the hard work and
love (and glue gun blisters) that went
into making her mobile. I know I enjoyed
putting it together for her!
More blogging will be coming soon.
PROMISE! =D
- Jenn (With 2 N's) -


The results are spectacular, adorable and memorable. Wow! Good job. Thanks for your prayers for me, btw, following June 1 shoulder surgery. Missed you at Jubilee Campmeeting, too!
ReplyDelete