
It's no secret that I'm in love with Pinterest, so when I saw this Anthropologie inspired headband, I knew I had to make it. I pinned it about 2 months ago, bought the supplies about 2 weeks ago, and just this weekend got the chance to sit down and actually make it.

So let's get to it! Things you'll need:

A headband, felt, pearls or beads, scissors and a hot glue gun.
I found these pre-strung pearls at Michaels, and opted for a plastic headband with teeth, since it seems to stick better on my head. I also found this awesome stiffened felt at Michaels. I was a goober and had it turned over in the picture, but the opposite side was slightly glittery. You won't see it once the pearls are on, but glitter never hurt anyone.
Measure out how many pearls you want. Mine were right at about 10" long, or approximately 55 pearls. I wanted smallish circles so I could put three on the headband.

Start by gluing down the first bead, on the knotted end. As I was doing this, I was holding the other end with my fingers so the pearls wouldn't fall off. If you decide to string them yourself, you can knot both ends. This would of course be easier, but I like to wait till midnight to do things. :)

Apply a generous portion of hot glue (don't skimp) and start gluing the pearls in a spiral.

You don't want glue seeping in between the pearls, but be sure to get enough glue or they won't stick to the felt. As you can see, I opted to do white pearls on white felt, but I also wanted my circles to be tight, so I made sure to push the pearls together on the strand and glue them close together.

Be sure when you start your circle that you will have plenty of space on the felt to complete it.

Repeat until you have the desired amount of circles. Even though the last pearl isn't knotted, the glue will keep it securely on the felt.
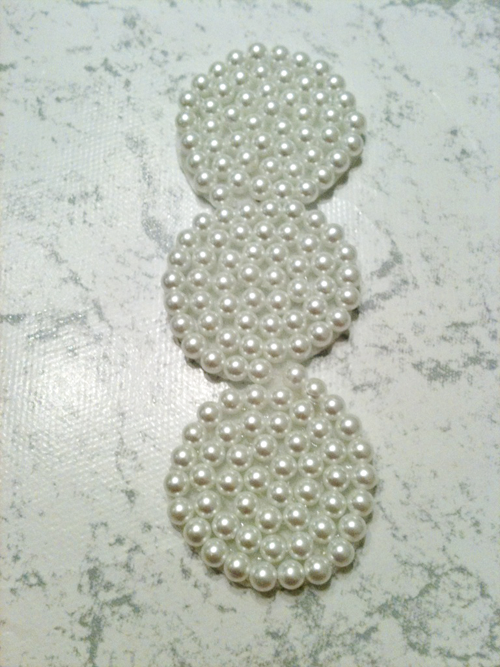
Cut out the circles, being sure to not leave felt on the edges, and space them together. I decided to make mine look like it was a continuous spiral. But really, you won't be able to tell when you get it on.

These tend to be heavy, so use plenty of glue when putting them on the headband. Normally when I get to this step I would glue an extra backing on the inside of the headband, but I wanted to preserve the gripper teeth, and they were sturdy enough because I used the stiff felt.

I got tons of compliments on this. It's probably my favorite headband I've made. The options for colors are endless, and it goes with anything. You could add a cute embellishment to the center, or use colored felt underneath. I picked up some black glittery pearls and gray felt to make one for my sister.
Tomorrow: Swirly Girly Scarf Tutorial
-Jenn (With 2 N's)
I really like this!!!
ReplyDelete