Guess what? You made it to Friday! Whoop Whoop! That's definitely cause for celebration, and a fun tutorial! After letting my camera know who was boss, I'm here with pics and a fun tutorial on an incredibly fast, easy scarf that has endless possibilites.
I've been seeing these all over Pinterest and blogs, I've watched a video on how to make them, seen tons of tutorials, and just had to try it. Like the headband, I made this in a fit of craftiness at midnight before our big Ladies Conference. It took me no time at all. Literally about 10 minutes max.
So let's get started! What you'll need:
Old t-shirts (as many as you want), a large plate (or something round) and scissors. Yep, that's all! I used a 10" dinner plate. How wide the circumference is will determine how long your scarf strands are.
Start with your first shirt, and cut it off right under the arms.
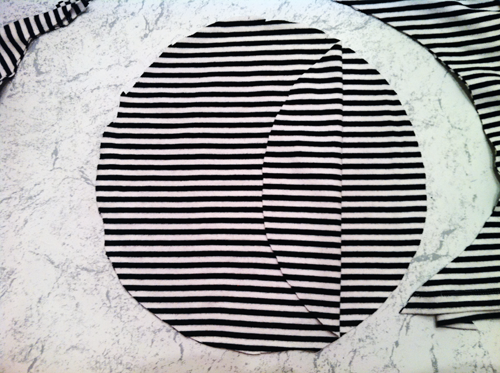
Use your plate as a guide to cut a circle out of the fabric. Leave the shirt intact so you can cut two pieces at one time.
Like so. Continue doing this until there is no more fabric. I was able to get 4 full circles out of my shirt (it was a 2XL) but ended up only using two. Each of these circles will become a strand in your scarf, so mix and match colors and use as many strands/circles as you want.
Start at one edge of the circle and begin cutting in a spiral. I made my strands about 2 inches wide.
Continue cutting until you have a cute fabric snake sitting on your table. :) At this point I left the center as a circle, but later went back and cut it to match the beginning of the strand.
Take each strand and stretch them out. Because they are cotton, they'll start curling into themselves and form a fun loopy swirl! A tip: This shirt I used happened to be stretchy, probably with something other than cotton in the material. It didn't want to curl too much, and ended up not swirling as much as the white pieces, which were used from a plain white t-shirt. Be sure to use cotton t-shirts for the best results.
Continue this process with your remaining shirts until you have the desired amount of strands. The fun thing about this scarf is that the possibilites are endless. You can mix and match colors, make some strands thick or some thin, and make just a few strands or a whole bunch of strands.
Once you have all the pieces you want, put them together and tie knots in them, or add your own embellishments! I've seen so many variations on these.
I've seen ones with pom-pom strands mixed in with the t-shirts, or fabric flowers clipped on. If you wanted to be really funky, you could use a smaller plate, and piece the ends together of different colors for a fun effect. Just knot two ends together until you reach the desired scarf length!
So there you go. A fun, swirly girly t-shirt scarf that takes less than 10 minutes to throw together. Looking at these pics, I think I'll go back and add a few black strands to mine to make it thicker. The more the better!
-Jenn (With 2 N's)


No comments:
Post a Comment